
- Sun Jun 18, 2023 5:21 pm
#96542
Using the Arduino IDE, you'll learn how to set up an ESP8266 NodeMCU access point for a web server. This enables you to connect to your ESP8266 through Wi-Fi without the need for a wireless router.
To set the ESP8266 as an access point, use
ESP8266 Station and Access Point
We connect the ESP8266 to a wireless router in most of our ESP8266 NodeMCU web server projects. In this configuration, we may connect to the ESP8266 over the local network.
In this case, the ESP8266 is set up as a station, while the router serves as an access point. So, to control the ESP8266, you need to be connected to your router's local network.
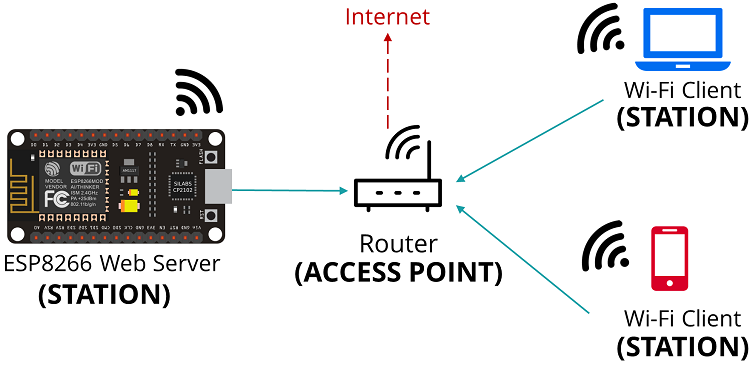
In some cases (when you don't have a router nearby), this may not be the ideal option. However, if you set the ESP8266 up as an access point (hotspot), you may connect to it using any device that supports Wi-Fi without the need to connect to your router.
In simple terms, when you set the ESP8266 as an access point, you create its own Wi-Fi network, and nearby Wi-Fi devices (stations) may connect to it.
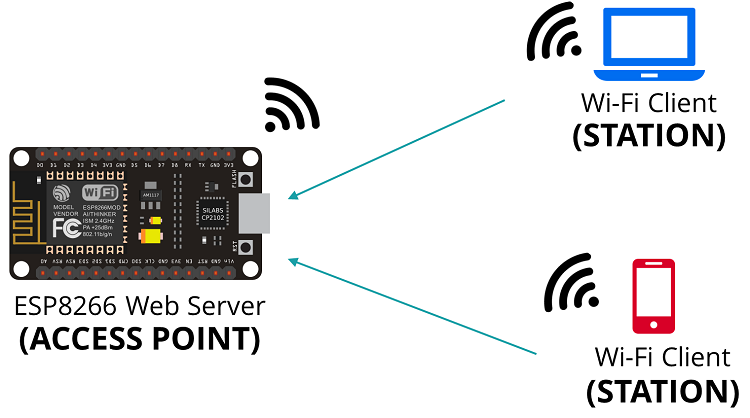
In this article, we'll show you how to set up the ESP8266 as an access point in your web server projects. You don't need to be connected to a router to control your ESP8266 this way.
The ESP8266 is called a soft-AP (soft Access Point) since it does not connect to a wired network (like your router).
This means that trying to load libraries or use firmware via the internet will not work. It also doesn't work when you try to send HTTP requests to internet services, such as publishing sensor readings to the cloud.
Installing the DHT Library for ESP8266
We'll use a previous web server project that displays sensor readings from a DHT sensor for this example.
To read from the DHT sensor, we'll use the Adafruit DHT library with the ESP8266 board installed in the Arduino IDE. You will also need to install the Adafruit Unified Sensor library to use this library.
To install the two libraries, follow the next steps:
1. Open your Arduino IDE and go to Sketch > Include Library > Manage Libraries. The library manager should open.
2. Search for “DHT” in the search box and install the DHT library from Adafruit.
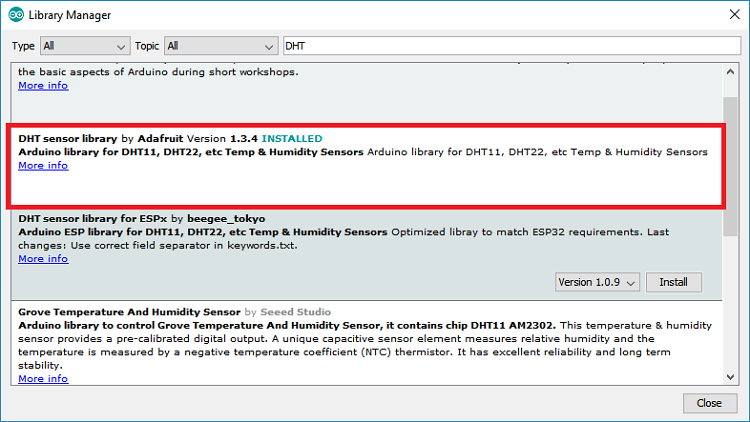
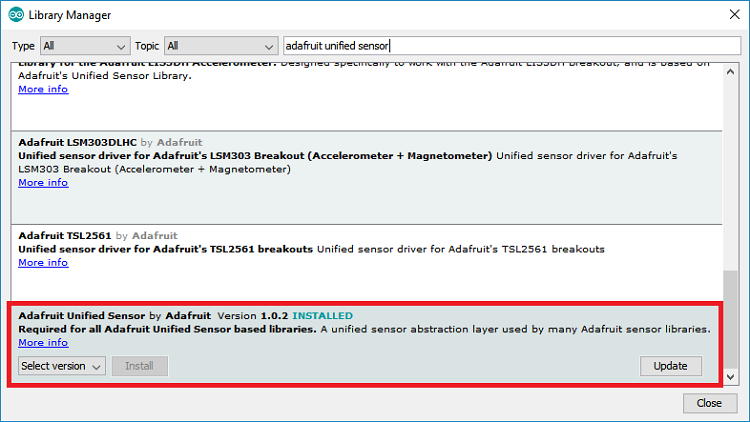
After installing the Adafruit DHT library, search for “Adafruit Unified Sensor” in the search box. Scroll all the way down to find and install the library.
After installing the libraries, restart your Arduino IDE.
Read the full article:
How to Set an ESP8266 NodeMCU Access Point for a Web Server
To set the ESP8266 as an access point, use
Code: Select all
WiFi.softAP(ssid, password);ESP8266 Station and Access Point
We connect the ESP8266 to a wireless router in most of our ESP8266 NodeMCU web server projects. In this configuration, we may connect to the ESP8266 over the local network.
In this case, the ESP8266 is set up as a station, while the router serves as an access point. So, to control the ESP8266, you need to be connected to your router's local network.
In some cases (when you don't have a router nearby), this may not be the ideal option. However, if you set the ESP8266 up as an access point (hotspot), you may connect to it using any device that supports Wi-Fi without the need to connect to your router.
In simple terms, when you set the ESP8266 as an access point, you create its own Wi-Fi network, and nearby Wi-Fi devices (stations) may connect to it.
In this article, we'll show you how to set up the ESP8266 as an access point in your web server projects. You don't need to be connected to a router to control your ESP8266 this way.
The ESP8266 is called a soft-AP (soft Access Point) since it does not connect to a wired network (like your router).
This means that trying to load libraries or use firmware via the internet will not work. It also doesn't work when you try to send HTTP requests to internet services, such as publishing sensor readings to the cloud.
Installing the DHT Library for ESP8266
We'll use a previous web server project that displays sensor readings from a DHT sensor for this example.
To read from the DHT sensor, we'll use the Adafruit DHT library with the ESP8266 board installed in the Arduino IDE. You will also need to install the Adafruit Unified Sensor library to use this library.
To install the two libraries, follow the next steps:
1. Open your Arduino IDE and go to Sketch > Include Library > Manage Libraries. The library manager should open.
2. Search for “DHT” in the search box and install the DHT library from Adafruit.
After installing the Adafruit DHT library, search for “Adafruit Unified Sensor” in the search box. Scroll all the way down to find and install the library.
After installing the libraries, restart your Arduino IDE.
Read the full article:
How to Set an ESP8266 NodeMCU Access Point for a Web Server


