
- Sun Jun 18, 2023 5:07 pm
#96541
In this project, you will post to Twitter using an ESP8266. The purpose of this project is to show you the limitless possibilities that this $4 WiFi module offers when integrated with the free platform I'm going to show you.
To do this task, sign up for a free service called “IFTTT“, which stands for “If This, Then That“.
IFTTT is a platform that allows you to have creative control over a variety of products and apps.
Apps may be made to work in tandem. When you make a request to IFTTT, for example, it triggers a recipe that sends you an email alert.
Creating Your IFTTT Account
Creating an account on IFTTT is free!
Go to the official site: https://ifttt.com/, and click the “Sign Up” button at the top of the page.
Complete the form with your personal information (see figure below) and create your account.

After creating your account, follow their getting started tutorial.
Open the Applet
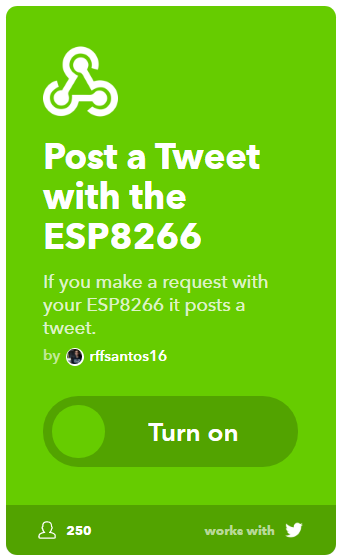
You may also use an Applet that I made that integrates perfectly with this project.
If you're logged in to IFTTT and open the URL below, you'll be able to use my Applet right away:
Press the “Turn on” button:
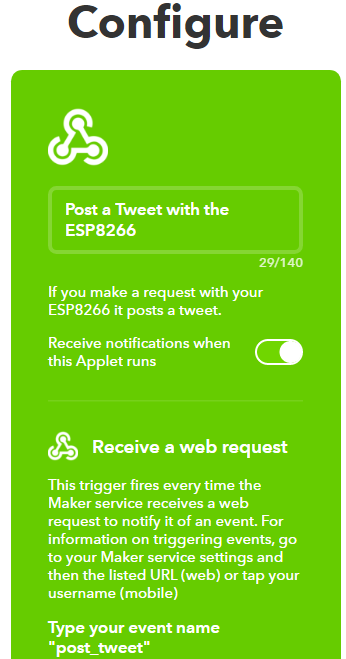
You then need to allow Maker Webhooks and Twitter access permissions. Allow IFTTT to connect to your Twitter account. When you finish connecting to Twitter, a new page loads.
Complete the Applet
Fill the Applet with your own information. Follow these instructions:
Read the full article:
How to Post on Twitter using an ESP8266
To do this task, sign up for a free service called “IFTTT“, which stands for “If This, Then That“.
IFTTT is a platform that allows you to have creative control over a variety of products and apps.
Apps may be made to work in tandem. When you make a request to IFTTT, for example, it triggers a recipe that sends you an email alert.
Creating Your IFTTT Account
Creating an account on IFTTT is free!
Go to the official site: https://ifttt.com/, and click the “Sign Up” button at the top of the page.
Complete the form with your personal information (see figure below) and create your account.
After creating your account, follow their getting started tutorial.
Open the Applet
You may also use an Applet that I made that integrates perfectly with this project.
If you're logged in to IFTTT and open the URL below, you'll be able to use my Applet right away:
Press the “Turn on” button:
You then need to allow Maker Webhooks and Twitter access permissions. Allow IFTTT to connect to your Twitter account. When you finish connecting to Twitter, a new page loads.
Complete the Applet
Fill the Applet with your own information. Follow these instructions:
- Type “post_tweet” in your event name
Edit the text that you want your ESP8266 to send out as a Tweet
Press the “Save” button
Read the full article:
How to Post on Twitter using an ESP8266


