Table of Contents
NodeMCU
The name NodeMCU refers to two separate components:
- The NodeMCU firmware which provides a Lua development and execution environment which can run on any ESP8266 module with a minimum of 512Kb Flash Memory.
- The NodeMCU Inc manufactured development kits. These are low-cost breadboard-friendly modules which are aimed at providing a simple to configure and set up, hardware platform for developing ESP8266-based Lua IoT applications.
Firmware
This is hosted on Github in the Nodemcu Firmware Repository with the NodeMCU Documentation online, and an nodeMCU Unofficial FAQ maintained on this wiki for answers to your “Frequently Asked Questions”.
Hardware
NodeMCU devkit is a development kit for NodeMCU firmware. It's aim is to make NodeMCU firmware development more easy. With a micro USB cable, you can connect NodeMCU devkit to your laptop and flash it without any trouble, just like Arduino. It is an open hardware, with ESP-12 core with 32Mbits(4MBytes) flash.
Devkit 0.8
This was the original design of NodeMCU devkit which never released on general sale.
Devkit 0.9
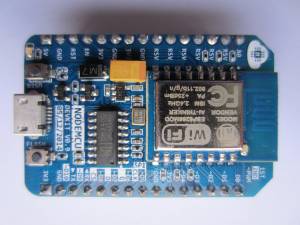
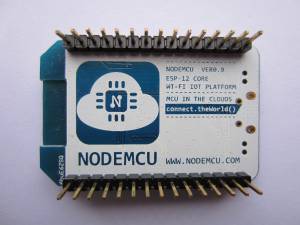
It is the second design of NodeMCU devkit. It uses CH340G as UART bridge, and can flash firmware automatically by using nodemcu-flasher.
Devkit 1.0
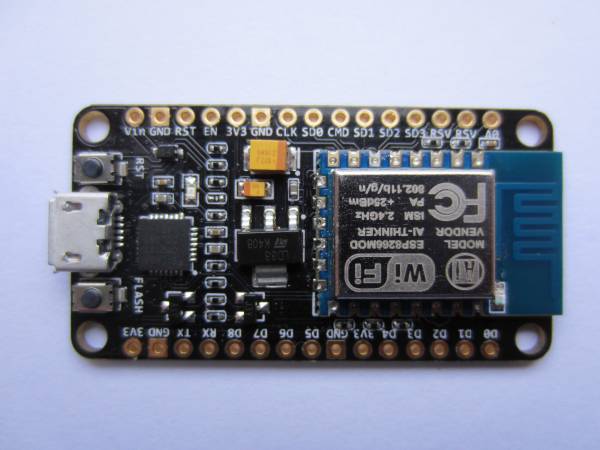
It is the 5th design of NodeMCU devkit. This uses CP2102 as UART bridge, and can flash firmware automatically by using nodemcu-flasher. It also supports Apple's MAC OS.
Introduction
- Website: http://www.nodemcu.com/index_en.html
Summary
- Easy to access wireless router
- Based on Lua 5.1.4 (without debug, os module.)
- Event-Drive programming preferred.
- Build-in json, file, timer, pwm, i2c, spi, 1-wire, net, mqtt, coap, gpio, wifi, adc, uart and system api.
- GPIO pin re-mapped, use the index to access gpio, i2c, pwm.
- Both Floating Point and Integer versions of the firmware can be built.
Dependencies
- Build on ESP8266 the current Espressif non-OS SDK.
- Lua core based on eLua project
- cjson based on lua-cjson
- File system based on spiffs
Flash the firmware
nodemcu_latest.bin: 0x00000
for most esp8266 modules, just pull GPIO0 down and restart.
You can use the nodemcu-flasher to burn the firmware.
Or, if you build your own bin from source code.
0x00000.bin: 0x00000
0x10000.bin: 0x10000
Better run file.format() after flash
Connect to the hardware via serial interface
Need to explain how to connect up serial portion.
baudrate:9600
Start play
Connect to your ap
ip = wifi.sta.getip()
print(ip)
-- nil
wifi.setmode(wifi.STATION)
wifi.sta.config("SSID","password")
ip = wifi.sta.getip()
print(ip)
-- 192.168.18.110
Manipulate hardware like a arduino
pin = 1
gpio.mode(pin,gpio.OUTPUT)
gpio.write(pin,gpio.HIGH)
print(gpio.read(pin))
Write network application in nodejs style
-- A simple http client
conn=net.createConnection(net.TCP, 0)
conn:on("receive", function(conn, payload) print(payload) end )
conn:connect(80,"115.239.210.27")
conn:send("GET / HTTP/1.1\r\nHost: www.baidu.com\r\n"
    .."Connection: keep-alive\r\nAccept: */*\r\n\r\n")
Or a simple http server
-- A simple http server
srv=net.createServer(net.TCP)
srv:listen(80,function(conn)
  conn:on("receive",function(conn,payload)
    print(payload)
    conn:send("<h1> Hello, NodeMcu.</h1>")
  end)
  conn:on("sent",function(conn) conn:close() end)
end)
Connect to MQTT Broker
-- init mqtt client with keepalive timer 120sec
m = mqtt.Client("clientid", 120, "user", "password")
-- setup Last Will and Testament (optional)
-- Broker will publish a message with qos = 0, retain = 0, data = "offline"
-- to topic "/lwt" if client don't send keepalive packet
m:lwt("/lwt", "offline", 0, 0)
m:on("connect", function(con) print ("connected") end)
m:on("offline", function(con) print ("offline") end)
-- on publish message receive event
m:on("message", function(conn, topic, data)
  print(topic .. ":" )
  if data ~= nil then
    print(data)
  end
end)
-- for secure: m:connect("192.168.11.118", 1880, 1)
m:connect("192.168.11.118", 1880, 0, function(conn) print("connected") end)
-- subscribe topic with qos = 0
m:subscribe("/topic",0, function(conn) print("subscribe success") end)
-- or subscribe multiple topic (topic/0, qos = 0; topic/1, qos = 1; topic2 , qos = 2)
-- m:subscribe({["topic/0"]=0,["topic/1"]=1,topic2=2}, function(conn) print("subscribe success") end)
-- publish a message with data = hello, QoS = 0, retain = 0
m:publish("/topic","hello",0,0, function(conn) print("sent") end)
m:close();
-- you can call m:connect again
UDP client and server
-- a udp server
s=net.createServer(net.UDP)
s:on("receive",function(s,c) print(c) end)
s:listen(5683)
-- a udp client
cu=net.createConnection(net.UDP)
cu:on("receive",function(cu,c) print(c) end)
cu:connect(5683,"192.168.18.101")
cu:send("hello")


