start-with-esp-12-arduino
Table of Contents
Starting with the ESP-12 and the Arduino tools
Hardware


- A few resistors have to be added to the ESP-12E module for proper operation.
- These resistors control the mode of operation at reset. With these resistors installed, the module will operate in normal mode after reset. The resistors can be overpowered to disable the module or reboot in a programming mode to upload new programming.
- If you are using a next generation 12S or newer module, resistors may already be on the module.
- If you are using a chinese white breakout board, the resistors are already included.
- The ESP-12E required resistors are:
- Pullup resistors connect to VCC (3.3V) and pulldown resistors connect to GND
- 10k pulldown resistor on the GPIO pin
- 10k pullup resistor on the EN pin (may be labeled CH_PD)
- 10k pullup resistor on the GPIO0 pin
- 10k pullup resistor on the GPIO2 pin
- ESP modules need either an external 3.3V power supply or a 3.3V regulator on the breakout board
- If you are using a chinese white breakout board the PC board wiring is incorrect, so don't solder a regulator onto the board without first reading http://thethingofinternets.com/?p=4 for an important note. The simplest solution is to use an external regulated 3.3V supply with these boards.
- Additional Capacitors between VCC and GROUND should also be added for more stability. 1nF plus 1000uF aluminium electrolytic capacitor proved to be best.
- To program the module, you will need a USB-to-serial adapter
- There are many USB to serial adapters - most adapters are identified by the name of the adapter chip
- The most common USB to Serial chips are the CH340G or various chips from FTDI
- Make sure your serial adapter supports 3.3V, or use a level shifter to allow 3.3V operation
- When programming, the GPIO0 pin has to be held low during reset to enable programming mode
- Some breakout boards include pushbuttons or jumpers
- For programing mode: While holding the FLASH button down, momentarily press “RESET”, then release the FLASH button
- For normal mode: press RESET without also pressing FLASH
- Some USB to Serial adapters allow using two of the serial handshake signals to allow the programming software to reset the module and pulldown GPIO0 during reset so you don't need to use jumpers or push any buttons during programming.
- You can also manually wire your own jumpers and/or switches for reset and GPIO0
- Summary
- Wire up Reset and GPIO0 Programming switch
- If you are using a programming switch and reset switch from the adapter, connect these from the adapter to the ESP12E.
- RXD from adapter to TX on ESP12E
- TXD from adapter to RX on ESP12E
- GND from adapter to GND on ESP12E
- VCC 3.3V from adapter to VCC 3.3V of ESP-12E (or the external 3.3V supply powering the ESP-12E module)
Software
Setup and test using the "blink" example
- Connect Hardware as shown above
- Check serial adapter
- Plugin Adapter (without ESP connected) to USB and check in Windows (with device manager) that you can see the new COM port
- If the device is not recognized, you will need to install a driver for your USB-to-serial adapter
- You can use Putty to test the COM port with RXD and TXD connected together. This will give you an echo on the terminal: everything you type is immediately visible in the terminal.
- Install the Arduino development tools
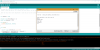
- Open the Arduino “File” → “Preferences” window and add in an additional Board Manager URL: http://arduino.esp8266.com/stable/package_esp8266com_index.json
- If you need multiple entries in this list (for example if you have an entry for another platform), you can add multiple URLs by separating them with commas
- After you enter the URL, press OK to close the dialog and save the change
- Open Arduino “Tools” → “Board:xxxxxxx” → “Board Manager”
- Change the “Type” in the upper left to “Contributed”
- Type “esp8266” in the filter box
- Select “NodeMCU 1.0 (ESP-12E Module)” and press the “Install” button
- NOTE: you could alternatively install the latest Master version from Git as explained here: https://github.com/esp8266/Arduino
- In “Tools” → PORT:“xxx” select the correct COM port for your serial adapter
- Open “File” → “Examples” → “Examples for NodeMCU 1.0 (ESP-12E Module)” → “ESP8266” → “BlinkWithoutDelay”
- Add the following Line on top of the example:
#define LED_BUILTIN 2- This is needed because the example is written for a ESP-01 module and not for ESP-12. The blue LED is on internal PIN 2 not on PIN 1.
- There seems to be some confusion on Port numbering. On the board this pin is labeled TXD0.
- Turn on the program switch on the board or on the adapter and push reset.
- In Arduino push the upload button (Blue arrow →) and wait until 100% is reached. While uploading the blue LED on the board is flashing.
- Turn the program switch off and push reset - you might need to cycle the power off and on
- If everything worked correctly, the blue LED should be flashing fast - Congratulations! Unfortunately the blue Led is also flashing slower if something went wrong.
- You also can watch the serial output on the Terminal within Arduino:
- go to “Tools” → “Serial Monitor” change to 74880 Baud do a reset again.
- Output message from the ESP-12E should appear just one time and not repeated like this:
- If repeated output happens the board is rebooting, and something is wrong with the program or wiring.
- Adapter can be removed now and programmed module can be used with an external 3.3V supply.

start-with-esp-12-arduino.txt · Last modified: 2018/08/26 17:47 by rudy